How to Get Facebook Verification for Your Business
You’re using WhatsApp for all your business communications. It’s working nicely. You’re closing deals right and left. So why should you care about getting Facebook verification for your business?
In addition to building credibility and giving your business a professional image, a Facebook verification also unifies your presence across Meta’s platforms (Facebook, WhatsApp, Instagram) and helps you eliminate communication gaps.
In this article, we’ll tell you how to get Facebook verification for your business and why it is a smart move.
What is Facebook verification?
Facebook verification is the process by which Facebook confirms your business is legitimate based on supporting documents that you provide.
While Facebook verification for businesses isn’t mandatory, it builds credibility, gives you access to more features in Meta’s suite and WhatsApp Business API, and makes your business easier to find on social media channels.
Why get business verification on Facebook
Here’s how Facebook verification can benefit your business:
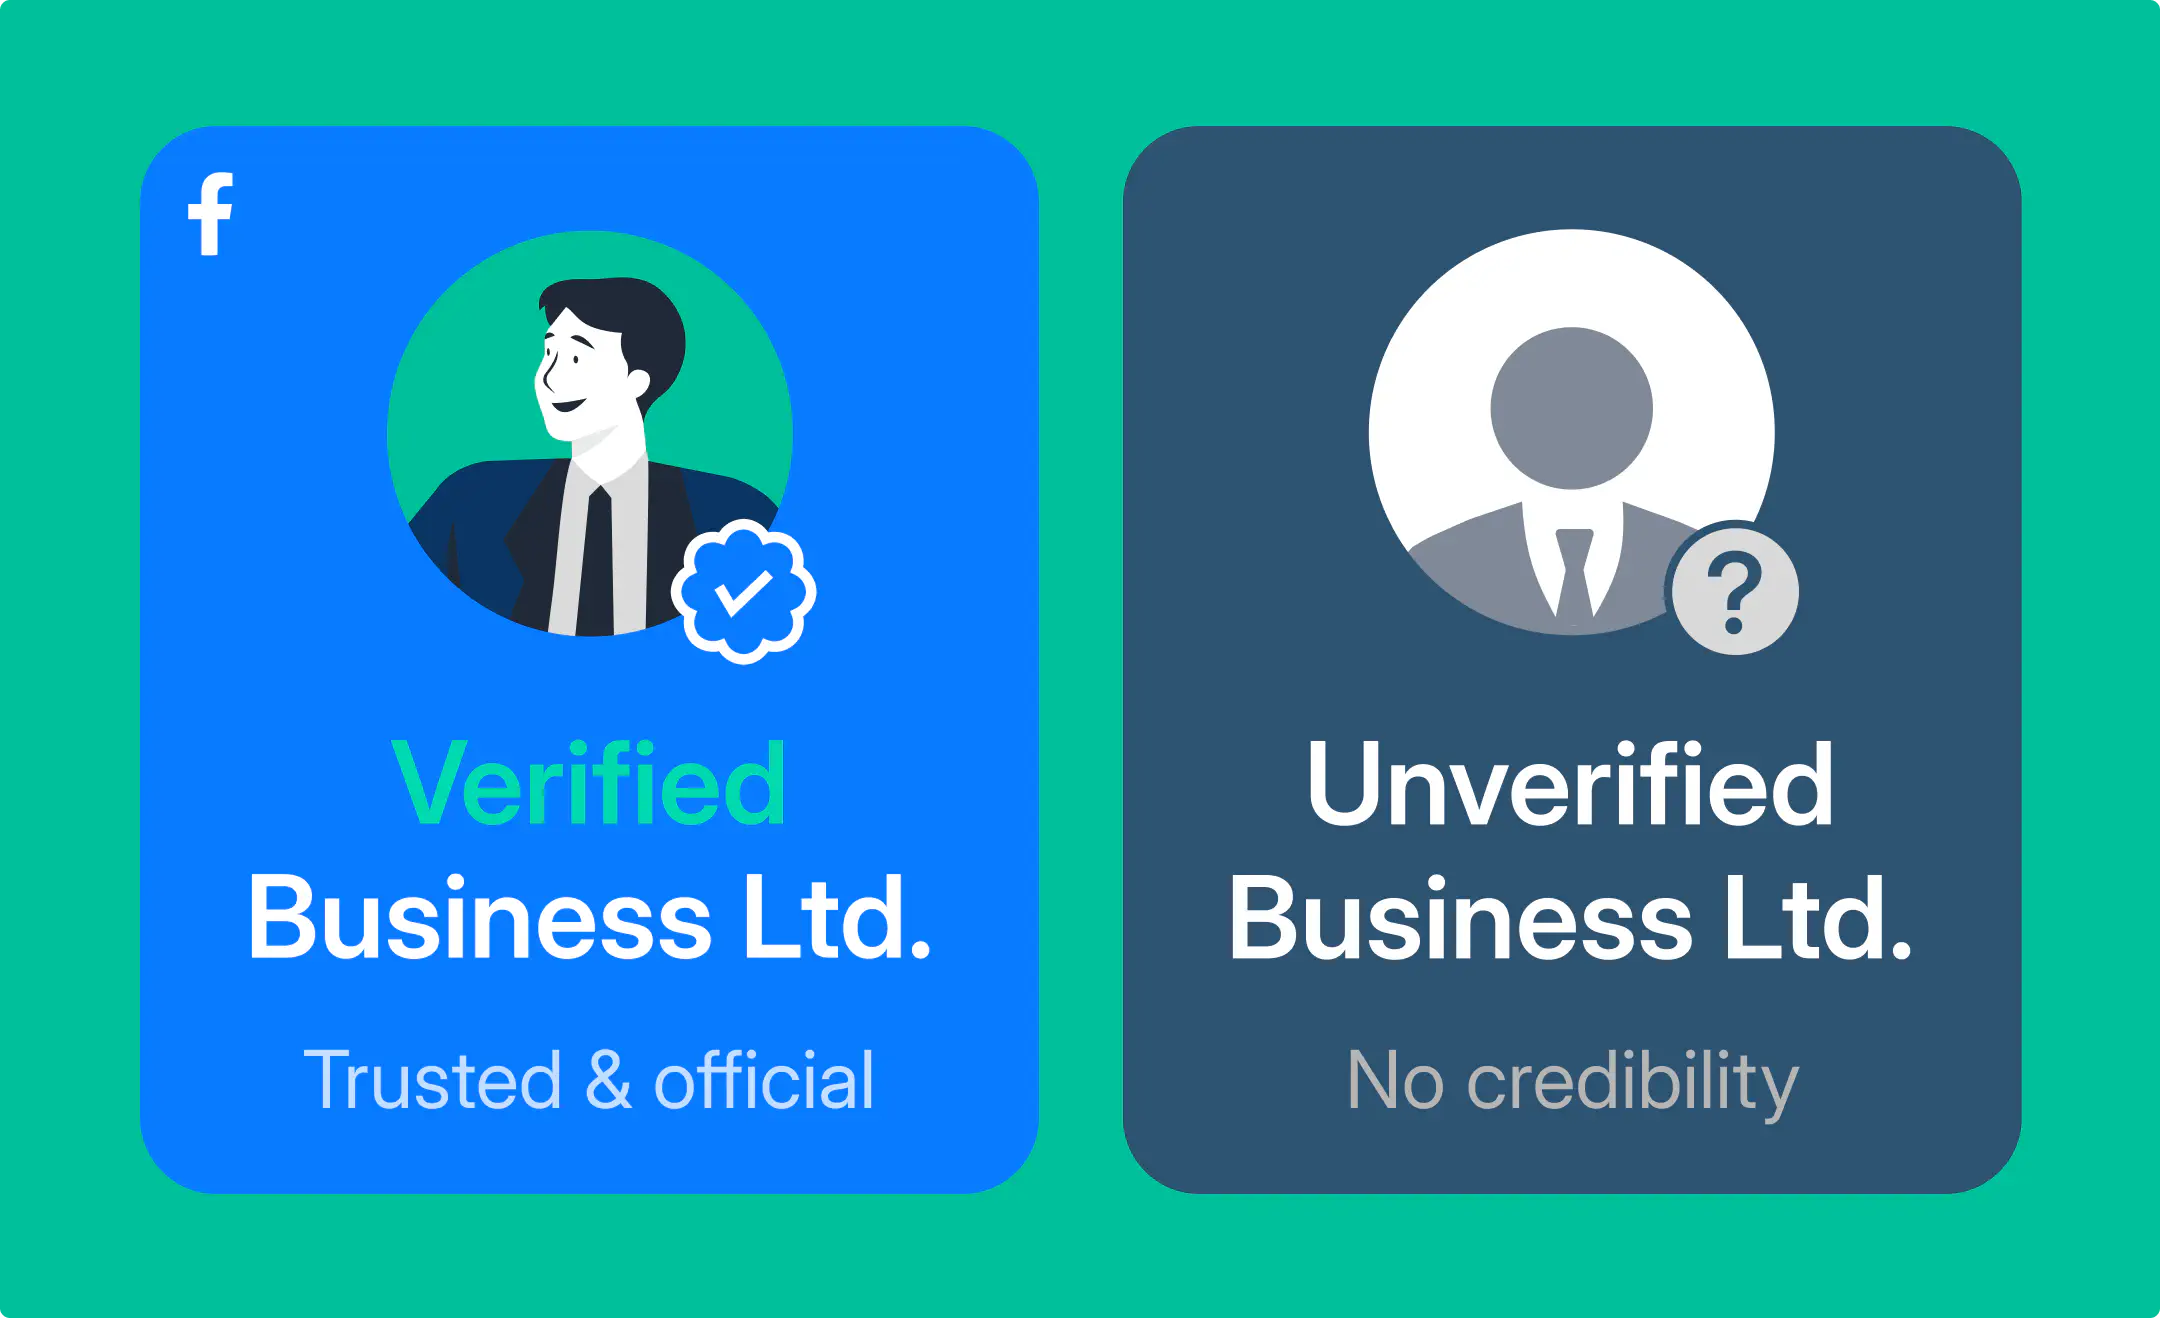
- Better credibility: Customers are more likely to trust your business and buy your product if it’s verified by Facebook.
- Greater visibility: Verified businesses show more in customer search results, so they’re easier to discover than the ones that aren’t verified.
- Advanced WhatsApp features: Facebook verification gives you access to a higher number of business-initiated conversations per day. Also, it makes you eligible for official business account status on WhatsApp Business API.
- Protection against impersonation: Verification helps customers identify your business immediately among potential impersonators, which prevents fraud and increases trust.
How to get Facebook verification for your business
To start applying for business verification, make sure you have full control of your Meta Business account (also known as a Business Manager account or business portfolio).
Then, follow these steps:
- Go to the Security Center of your Business Manager. Click on Start Verification. (If you don’t see the Start Verification button, your business isn’t eligible for verification.)
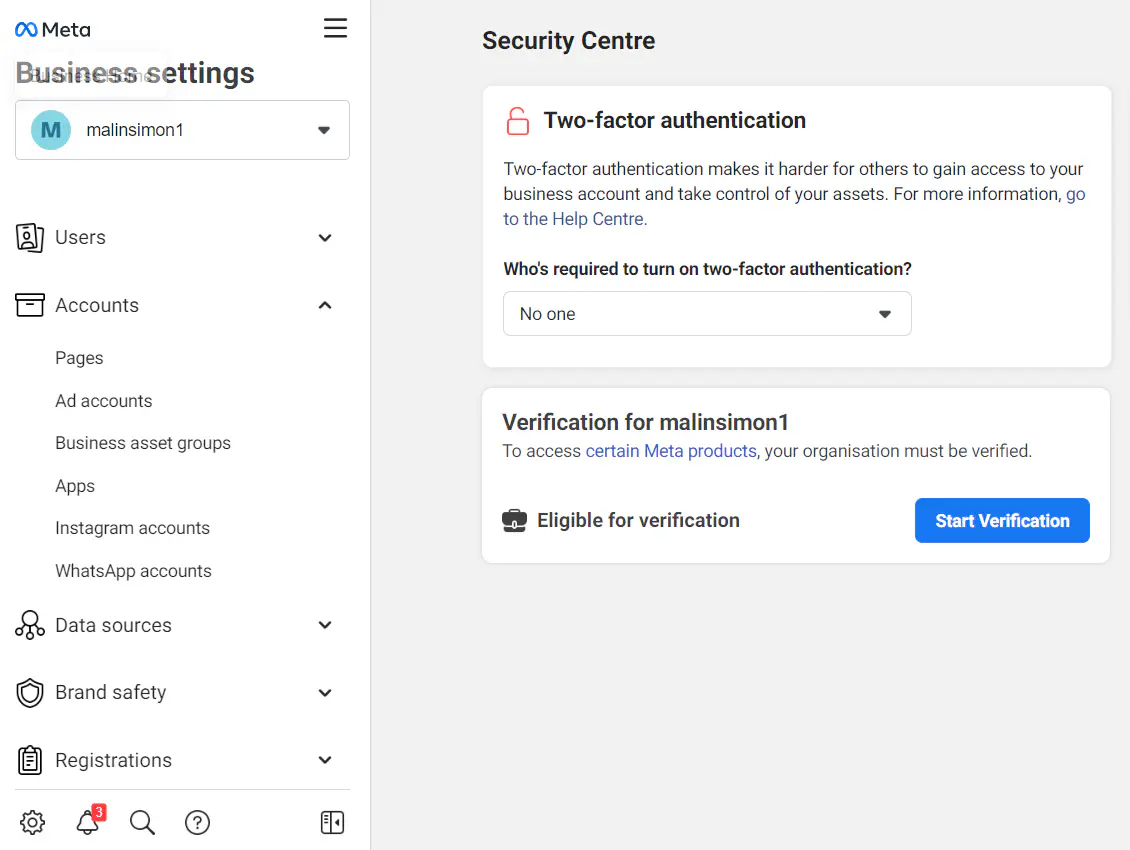
- Click on Get Started
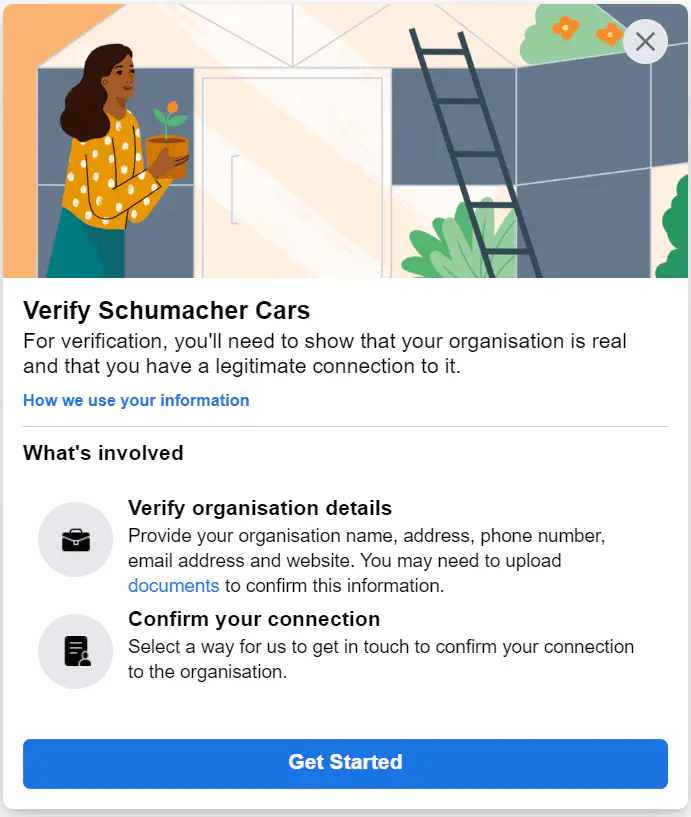
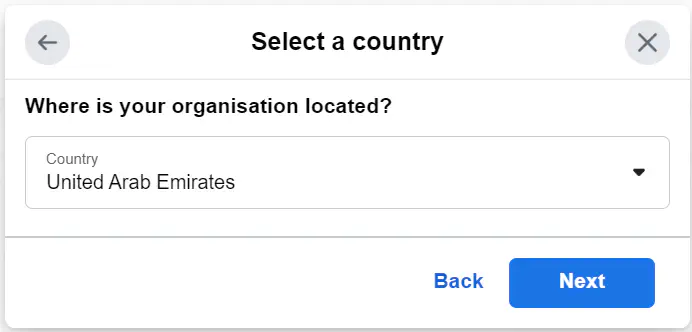
- Select the country where your business is located. Click Next.
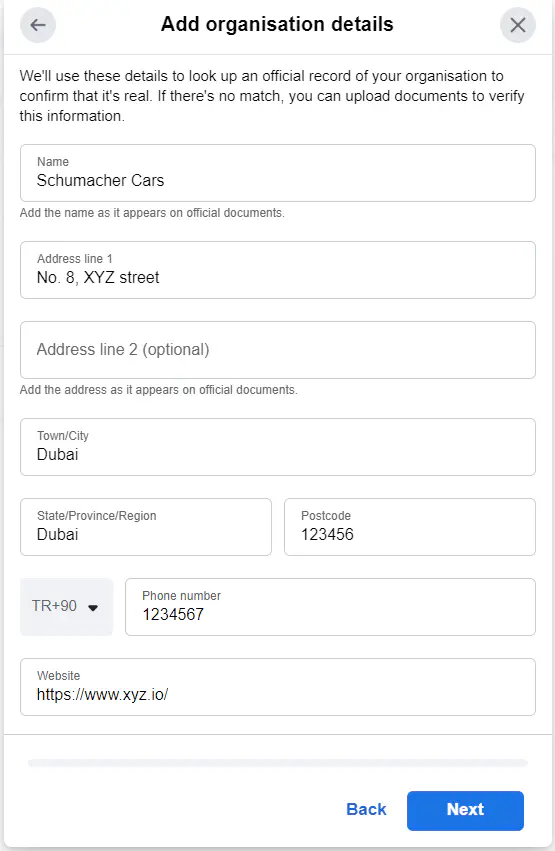
- Add your company address information. Click Next.
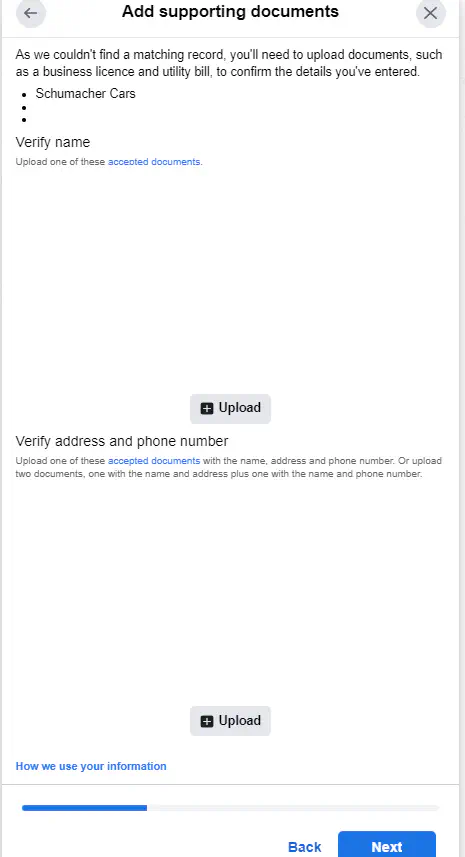
- Upload supporting documents to verify that your business exists. If you’re not sure which documents to submit, click on accepted documents.
- Choose how you would like Facebook to send you a verification code (email, phone number, text message, domain verification). The phone number option may not be available in some countries.
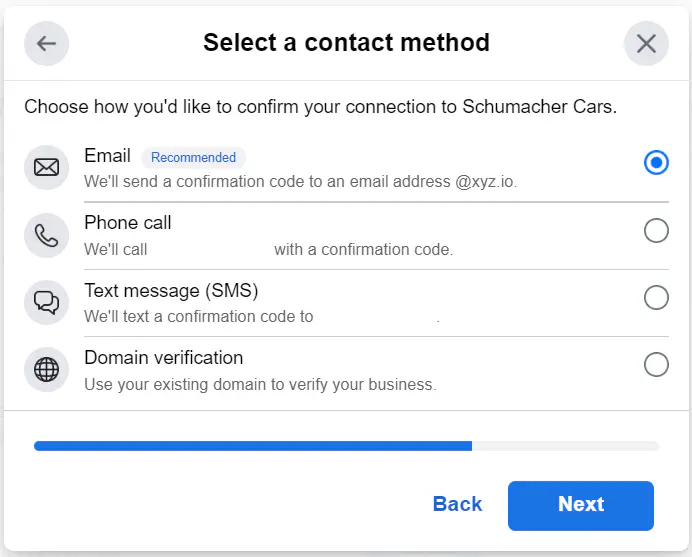
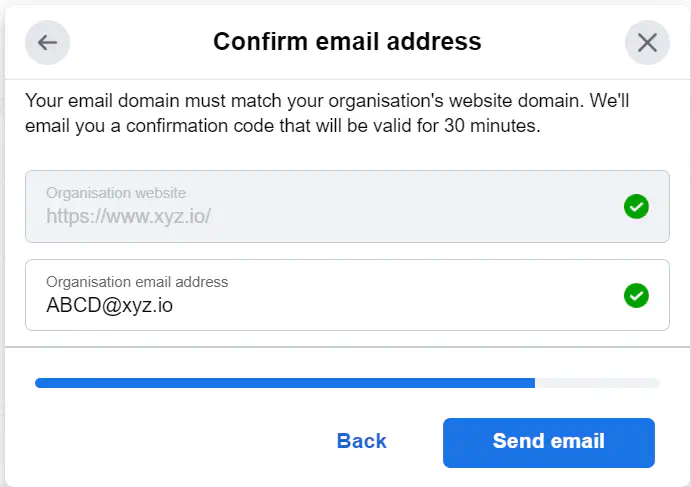
- If you selected Email in the previous step, you need to type in your email address in this step. Your email address domain must be the same as your company domain. Click Send Email.
If you selected SMS in the previous step, confirm your number and click Text Me Now.
Learn when to use domain verification to verify your business here.
- Copy the code sent to you and paste it into the field. Click Next.
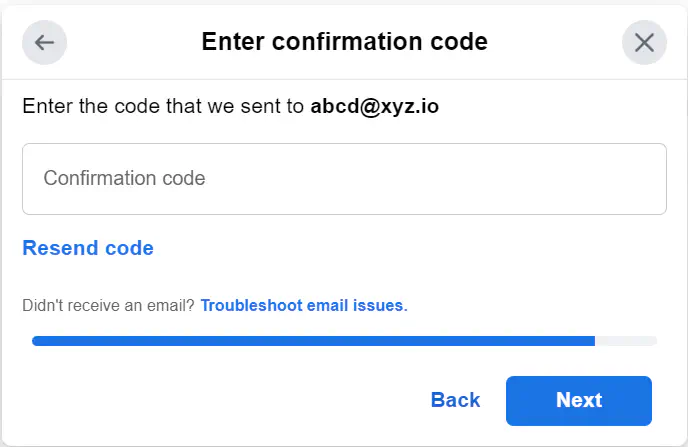
That’s it. Now that you’re done, you have to wait for Meta to confirm or deny your verification, The review process might take anywhere from a few minutes to 14 days, and you’ll receive a notification once it’s over.
Why your Facebook business verification might get denied and what to do
Getting your Facebook verification isn’t a done deal. Meta might reject your request for the verification for several reasons, including the following:
- Incomplete information: Meta requires information about your business to be able to verify it. If you send incomplete information or are unable to provide supporting documents, your verification might be denied.
- Unclear or expired documents: If the supporting documents you send to Meta are expired, hard to read, or don’t show your legal business name and information clearly, Facebook won’t accept them and will deny your verification.
- Self-filed documents: Facebook doesn’t accept files that have been filed by the business without the presence of an official seal or signature.
- Inconsistent business details: To get your verification, your business address, phone number, and legal name need to match those on the supporting documents you send to Meta. If there are any inconsistencies, you might get rejected.
In case your application gets rejected, you might be eligible for an appeal. To know for sure, visit the Security Center and check the status of your business verification.
Conclusion
Getting your business verified on Facebook is the right move for better credibility, a unified presence across Meta platforms, and access to WhatsApp Business API features.
To apply for verification, all you have to do is provide your business information, send supporting documents, and wait for Meta’s decision. If your application gets rejected, you can appeal the decision and re-apply,
After you’ve verified your business and gained full access to WhatsApp Business API features, check out this guide to learn how it can benefit your business!
Frequently Asked Questions
Yes, Facebook can revoke your verification if any of the following occurs:
- Your business violates Facebook’s terms of service
- Your business’ website is no longer active or functional
- You provide misleading information during the verification process

Hania is a seasoned researcher and content writer specializing in WhatsApp Business and its role in B2B sales and customer engagement. With years of experience creating in-depth, thought-provoking content, she combines real-life use cases and deep industry insights to help businesses leverage WhatsApp as a growth tool. Her expertise lies in translating complex research into actionable strategies, making her a trusted resource for companies looking to innovate their communication and sales processes.


![How to use WhatsApp on Desktop and Web [2025 Guide]](https://learn.rasayel.io/en/blog/whatsapp-web-desktop/cover_hu2633909085762267619.webp)
