What Is the WhatsApp Business Platform & How to Set It Up?


WhatsApp is fast, familiar, and easy to use. That’s why so many sales teams have been using the WhatsApp Business App to sell. But as conversations pile up and your team grows, it gets harder to keep up. Reps miss leads. Managers lose oversight.
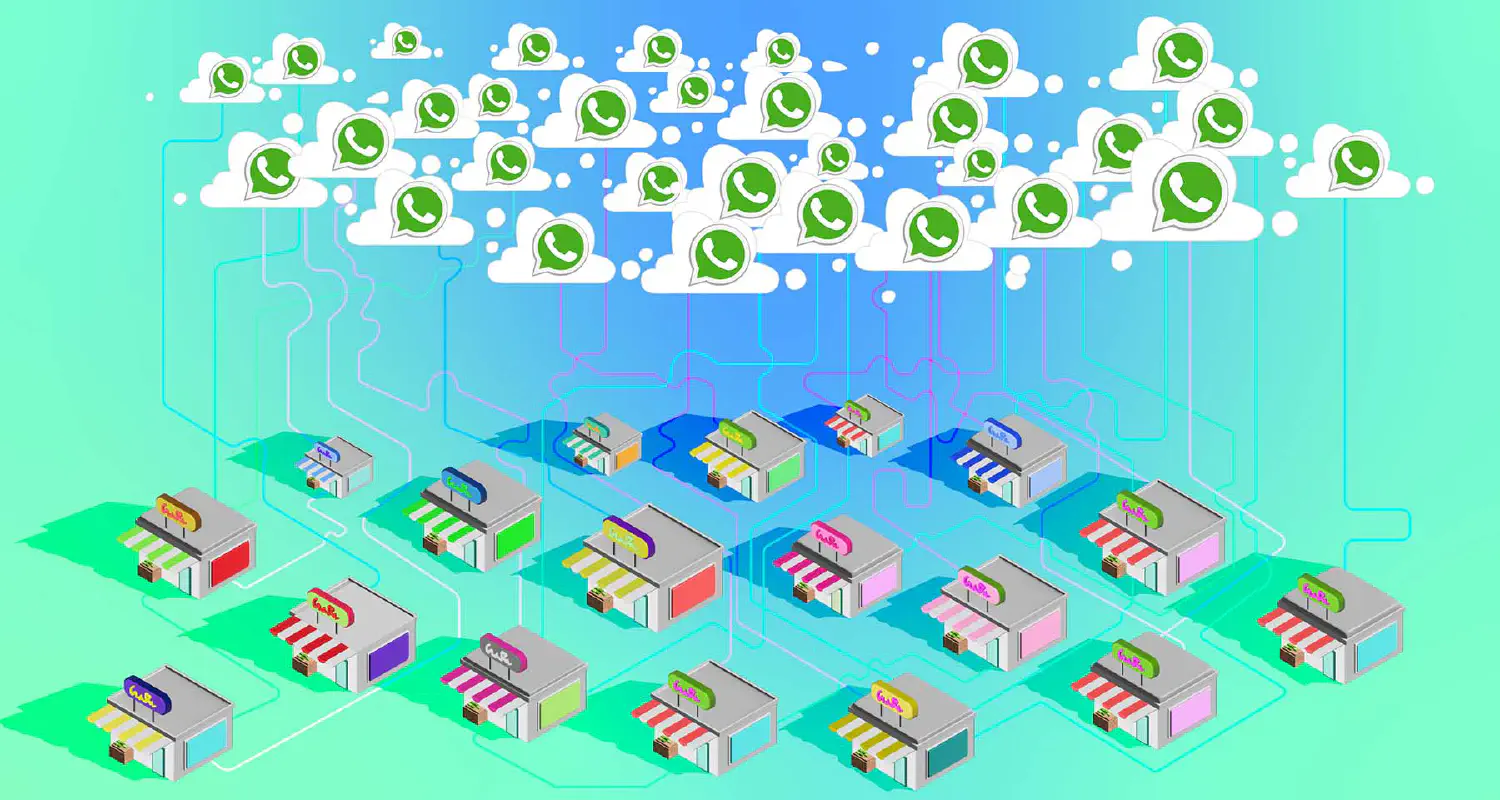
That’s why growing businesses make the switch to WhatsApp Business Platform. It’s built for scale, automation, and easy integration with other sales tools in your tech stack.
In this article, we’ll cover how WhatsApp Business Platform works, its key features, how it differs from the app, and how your sales team can use the API to close deals faster and support customers better.
What is the WhatsApp Business Platform
The WhatsApp Business Platform is a messaging solution built to help medium and large businesses unlock the power of the WhatsApp API. It allows them to manage customer conversations on WhatsApp at scale through automations, integrations and shared access.
With the WhatsApp API, your team can:
- Collaborate in a shared inbox and assign conversations to the right reps
- Automate responses with chatbots and custom workflows
- Track performance with analytics and WhatsApp message insights
- Integrate WhatsApp with your CRM and existing tech stack
- Get insight into team analytics to track and optimize performance
For B2B SaaS companies, the Business Platform makes it easier to run high-touch sales conversations at scale, which leads to shorter sales cycles, and better customer engagement on WhatsApp.
Traditional channels like email or phone don’t scale easily, however, WhatsApp API enables teams to manage large volumes of conversations without compromising on the personalization WhatsApp is known for.
But if you’re already on the WhatsApp Business App, you might be wondering: Do I really need to make the switch to the API? Let’s break it down.
Why switch from WhatsApp Business App to API
“We already use the WhatsApp Business App. Why would we transition to the API?”
It’s a question we hear all the time from B2B sales agents on the business app. And it makes sense — if your current setup lets you respond to customers, why change it?
The WhatsApp Business app works well, until it doesn’t. As your sales team grows, what once felt like a simple solution quickly becomes messy and inefficient.
The challenge isn’t that the Business App stops working, it’s that it doesn’t help you scale. With a growing sales pipeline, messages start to get lost, salesreps overlap conversations, and there’s no way for sales managers to track performance, assign leads, or automate follow-ups.
That’s where the WhatsApp Business API comes in. It’s built for growing teams that need structure, automation, integrations and visibility,without sacrificing the speed and convenience WhatsApp is known for.
To help you decide which solution fits your business needs, here’s a quick comparison:
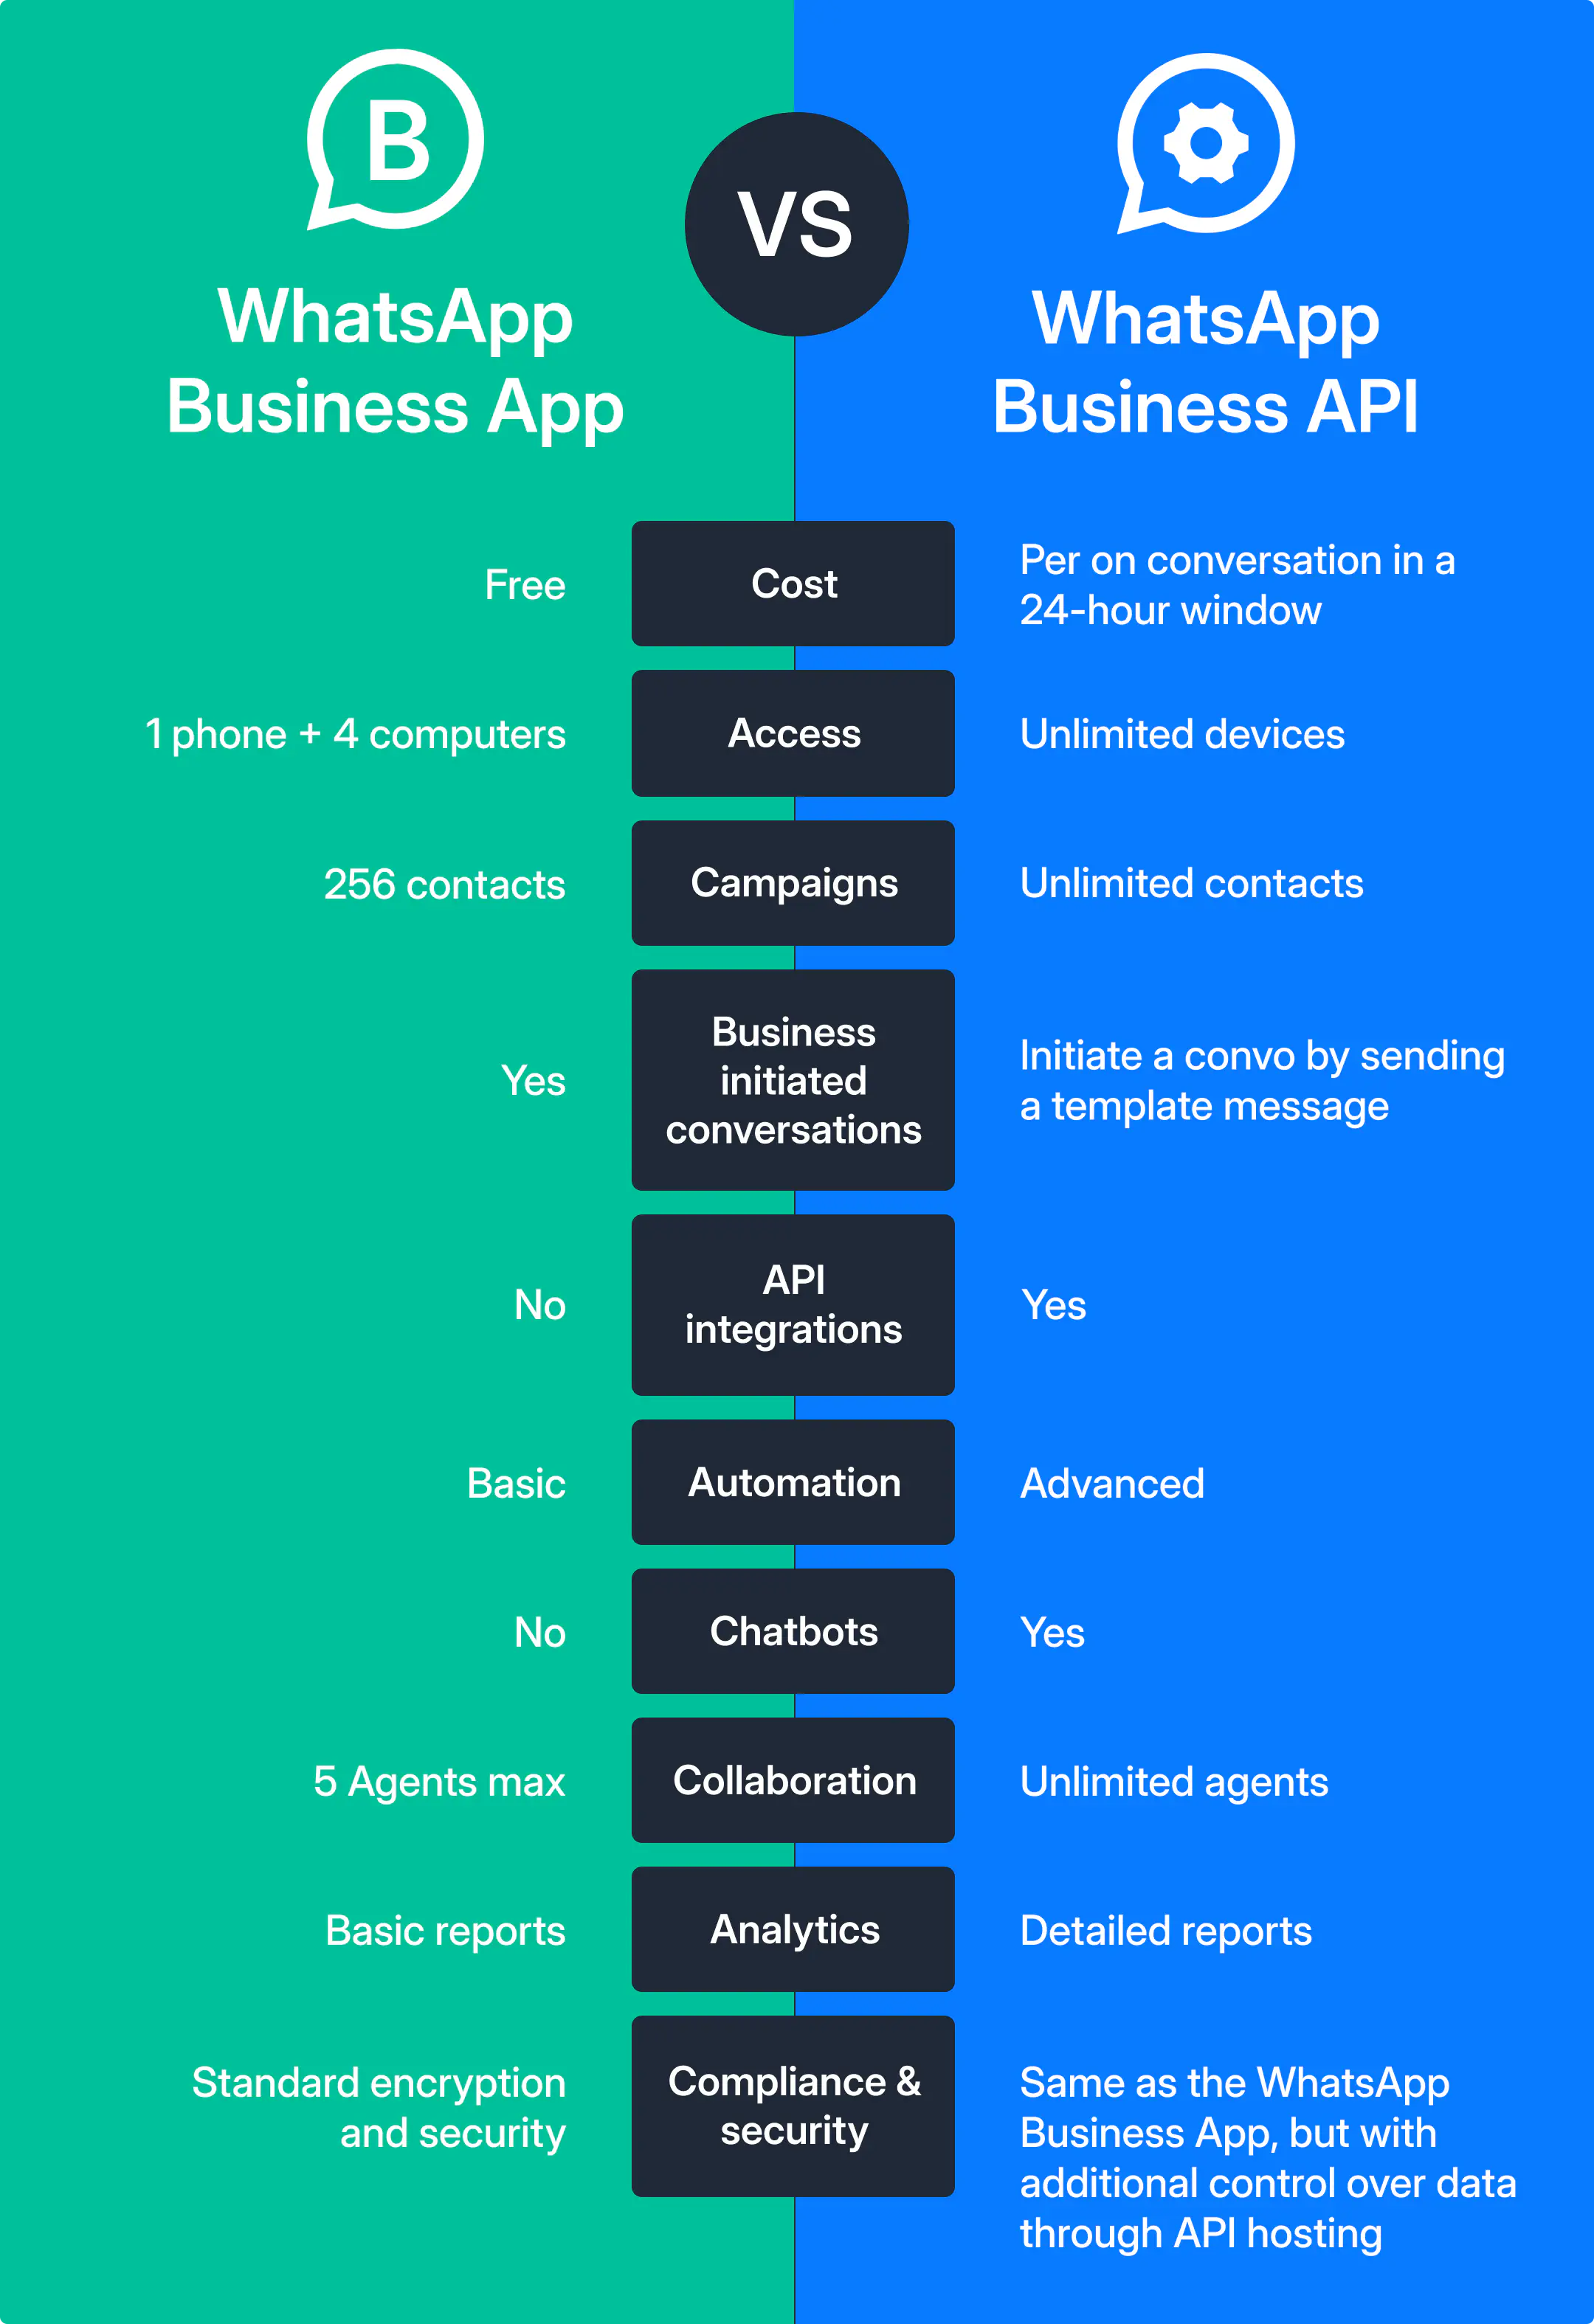
Explore the differences between the WhatsApp Business App and Platform to assess if this is the right move for your business needs.
Want to use WhatsApp Business App and API together?
If you’re not ready to give up the Business App and you’re worried that the switch to the API means losing chats, contacts, or workflows - there’s good news.
Meta recently introduced WhatsApp Coexistence, a feature that allows businesses to use both the WhatsApp Business App and the WhatsApp Business API on the same phone number. This means you can maintain your existing WhatsApp contacts and chat history while also tapping into the advanced capabilities of the API. It’s a seamless way to improve your workflow without disrupting your existing sales and support processes.
WhatsApp API features for B2B sales teams
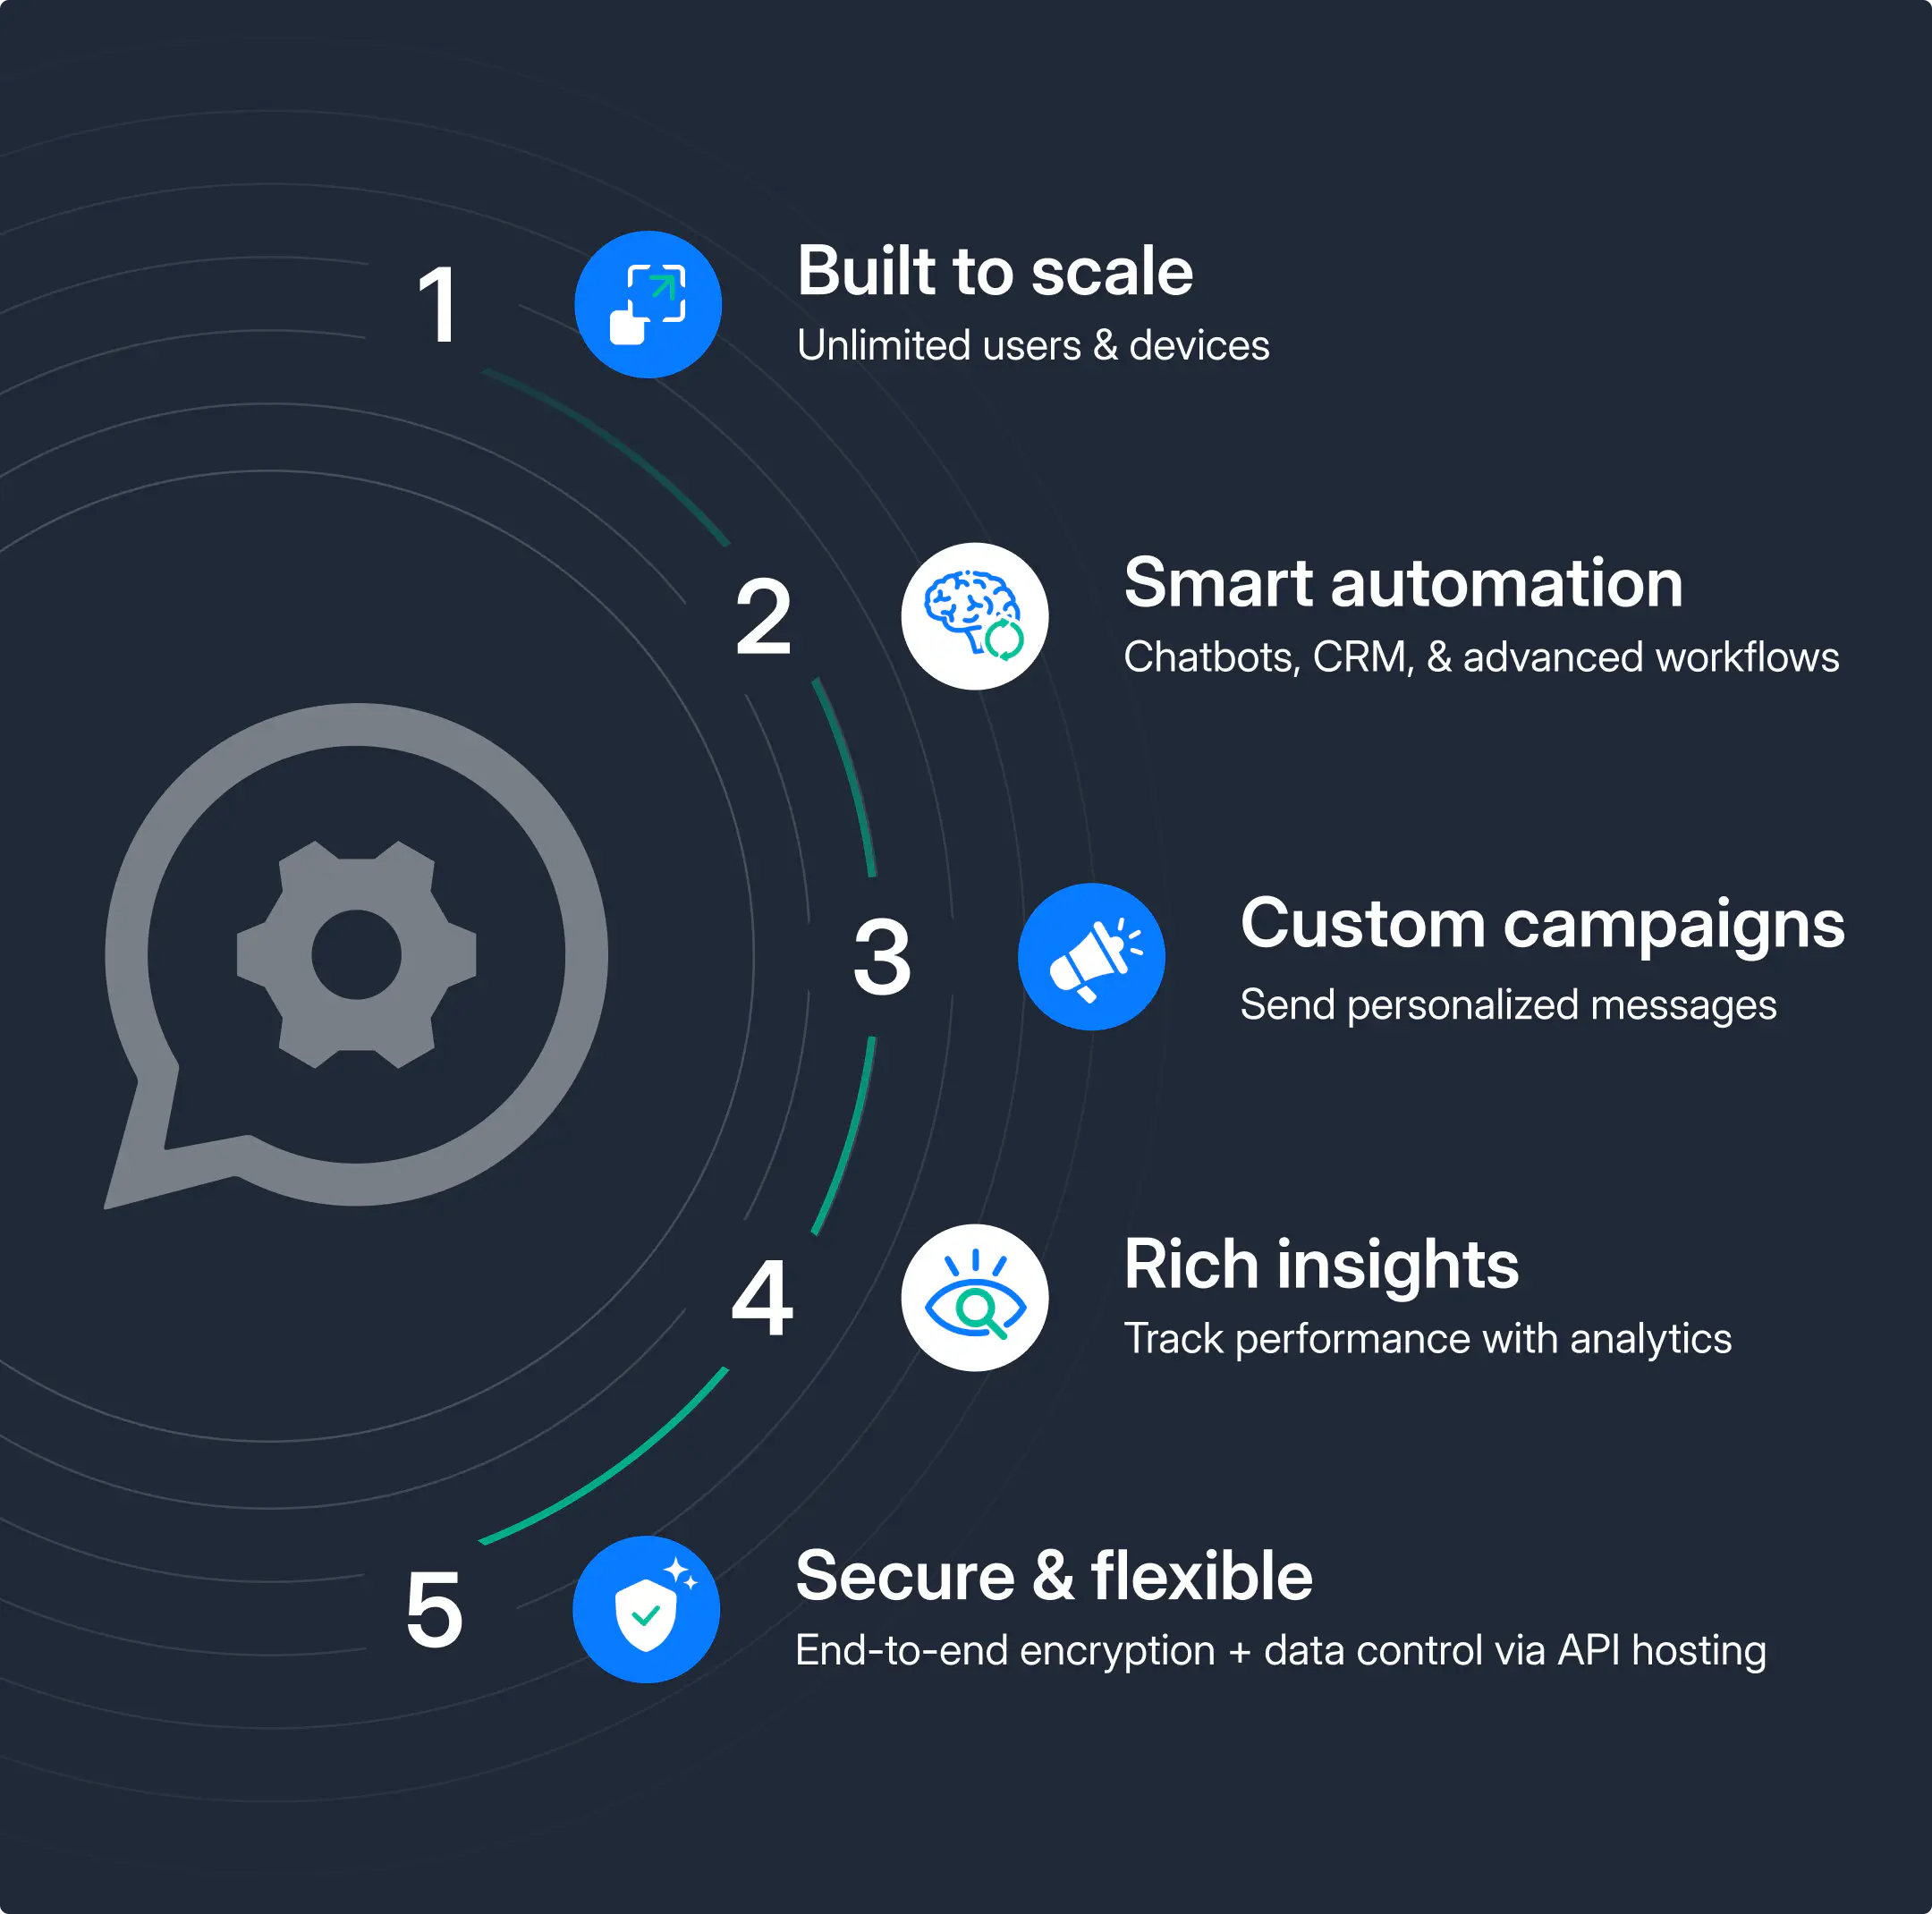
Messaging & Communication
Shared team inbox: A WhatsApp inbox allows you to assign, snooze, tag, and centralize all conversations in a single interface to improve collaboration & visibility.
Different team inboxes have different features. But generally speaking, you should be able to:
- Manage multiple users and devices without limitations
- Organize conversations with advanced filters, folders & inbox views
- Assign conversations to the right teams, ensuring no lead is missed
- Control access with roles and permissions to maintain compliance and security
Multi-device access: Team members with multiple devices can handle and collaborate on conversations simultaneously — no more one-device limitations.
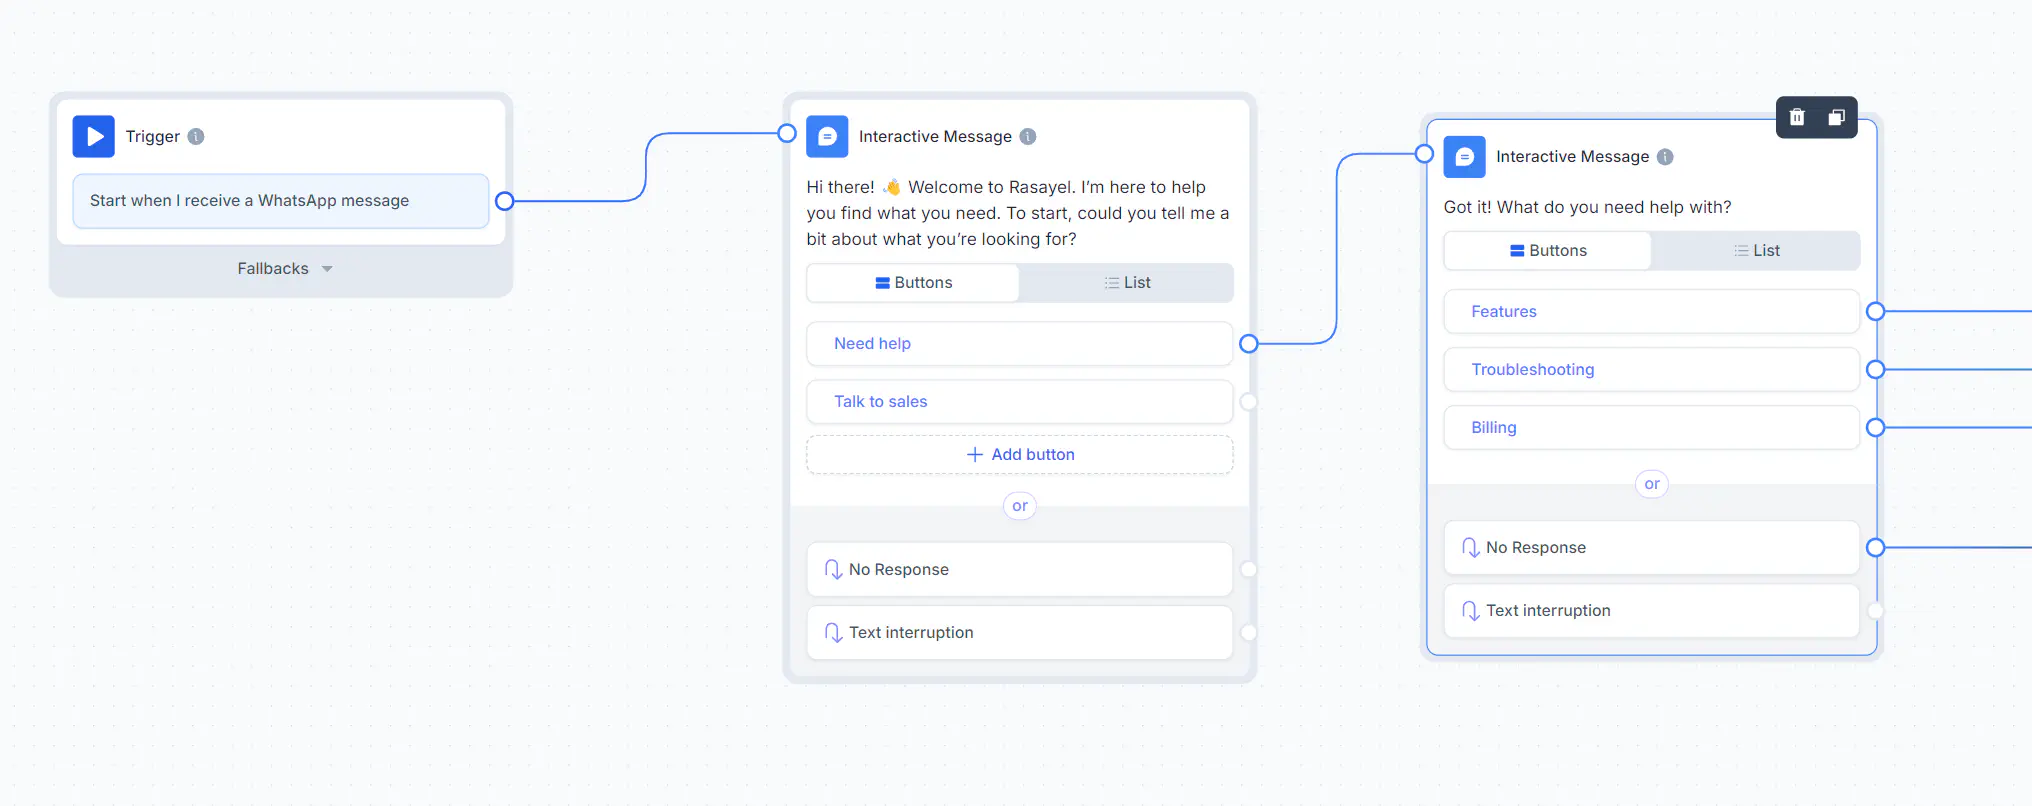
Interactive messages: Use interactive WhatsApp messages for a better customer experience & higher response rates.
Product catalogs: Showcase products or services directly in a WhatsApp catalog for better customer engagement.
In-chat payments (where supported): Let customers complete purchases and pay through WhatsApp.
No limits on WhatsApp Broadcasts: While the Business app limits you to 256 contacts (who also must have your number saved) in a broadcast list, WhatsApp API for Business allows you to send bulk messages to your prospects and leads to an unlimited number of contacts. However, it’s important to make sure WhatsApp approves your message templates in order to start conversations.
WhatsApp Automation & AI
Chatbots: Set up a custom WhatsApp chatbot to automate responses and handle common customer queries.
Automated workflows: Set up triggers and actions to automate your workflow on WhatsApp and improve your overall customer experience.
AI-powered responses: Provide quick and accurate answers to customer inquiries by using AI trained on your company’s knowledgebase. This will allow your team to focus on more complex tasks while it automates customer support routine queries.
Suite of AI sales agents: Use an AI sales assistant to help you run every stage of your sales process more efficiently.
WhatsApp Integrations
CRM Integration: Connect WhatsApp with CRM easily to sync customer data, eliminate erroes and save your team time between tools.
Third-party tools integration: Integrate WhatsApp with your sales tech stack to manage your entire sales process and team better - all from 1 app.
Click-to-WhatsApp ads: Run chat on WhatsApp ads that initiate conversations directly from platforms like Facebook and Instagram.
WhatsApp analytics & reporting
Conversation insights: Monitor key WhatsApp sales metrics like response times, resolution rates, and customer satisfaction.
Agent performance tracking: Evaluate individual team member performance based on predefined KPIs.
WhatsApp Business Platform pricing
You’ve seen what the API can do. But now, you’re probably wondering what it actually costs to use the WhatsApp Business API and how pricing works once you’re ready to scale.
For now, pricing for WhatsApp Business Platform is based on conversations, not individual messages. WhatsApp charges per 24-hour conversation window, depending on how and when the conversation is started.
Update: Starting July 1st 2025, WhatsApp is moving to message-based pricing.
This means businesses will be charged per delivered template message. Replies from customers will still open a 24-hour window where you can respond freely with no extra charge.
You will also need a third-party WhatsApp communication platform - like Rasayel - to actually use the API, since it doesn’t come with a built-in interface. Some providers charge per agent, others per conversation, or offer tiered plans.
Our API pricing guide breaks down what the costs are, how pricing works and what to expect. And if you’re looking to reduce costs, this article on how to save money on WhatsApp API walks through smart ways B2B SaaS teams can keep spending under control.
What do you need to set up WhatsApp API
Before you create a WhatsApp API account, make sure you meet these requirements:
A business that is officially registered and legally operating.
A live website with a clear privacy policy is essential.
You operate in a supported region and industry (industries like gambling or firearms are restricted)
A dedicated phone number that is not registered on any existing WhatsApp account or app.
Familiarize yourself with WhatsApp’s Business and Commerce Policies.
How to create a WhatsApp Business API account
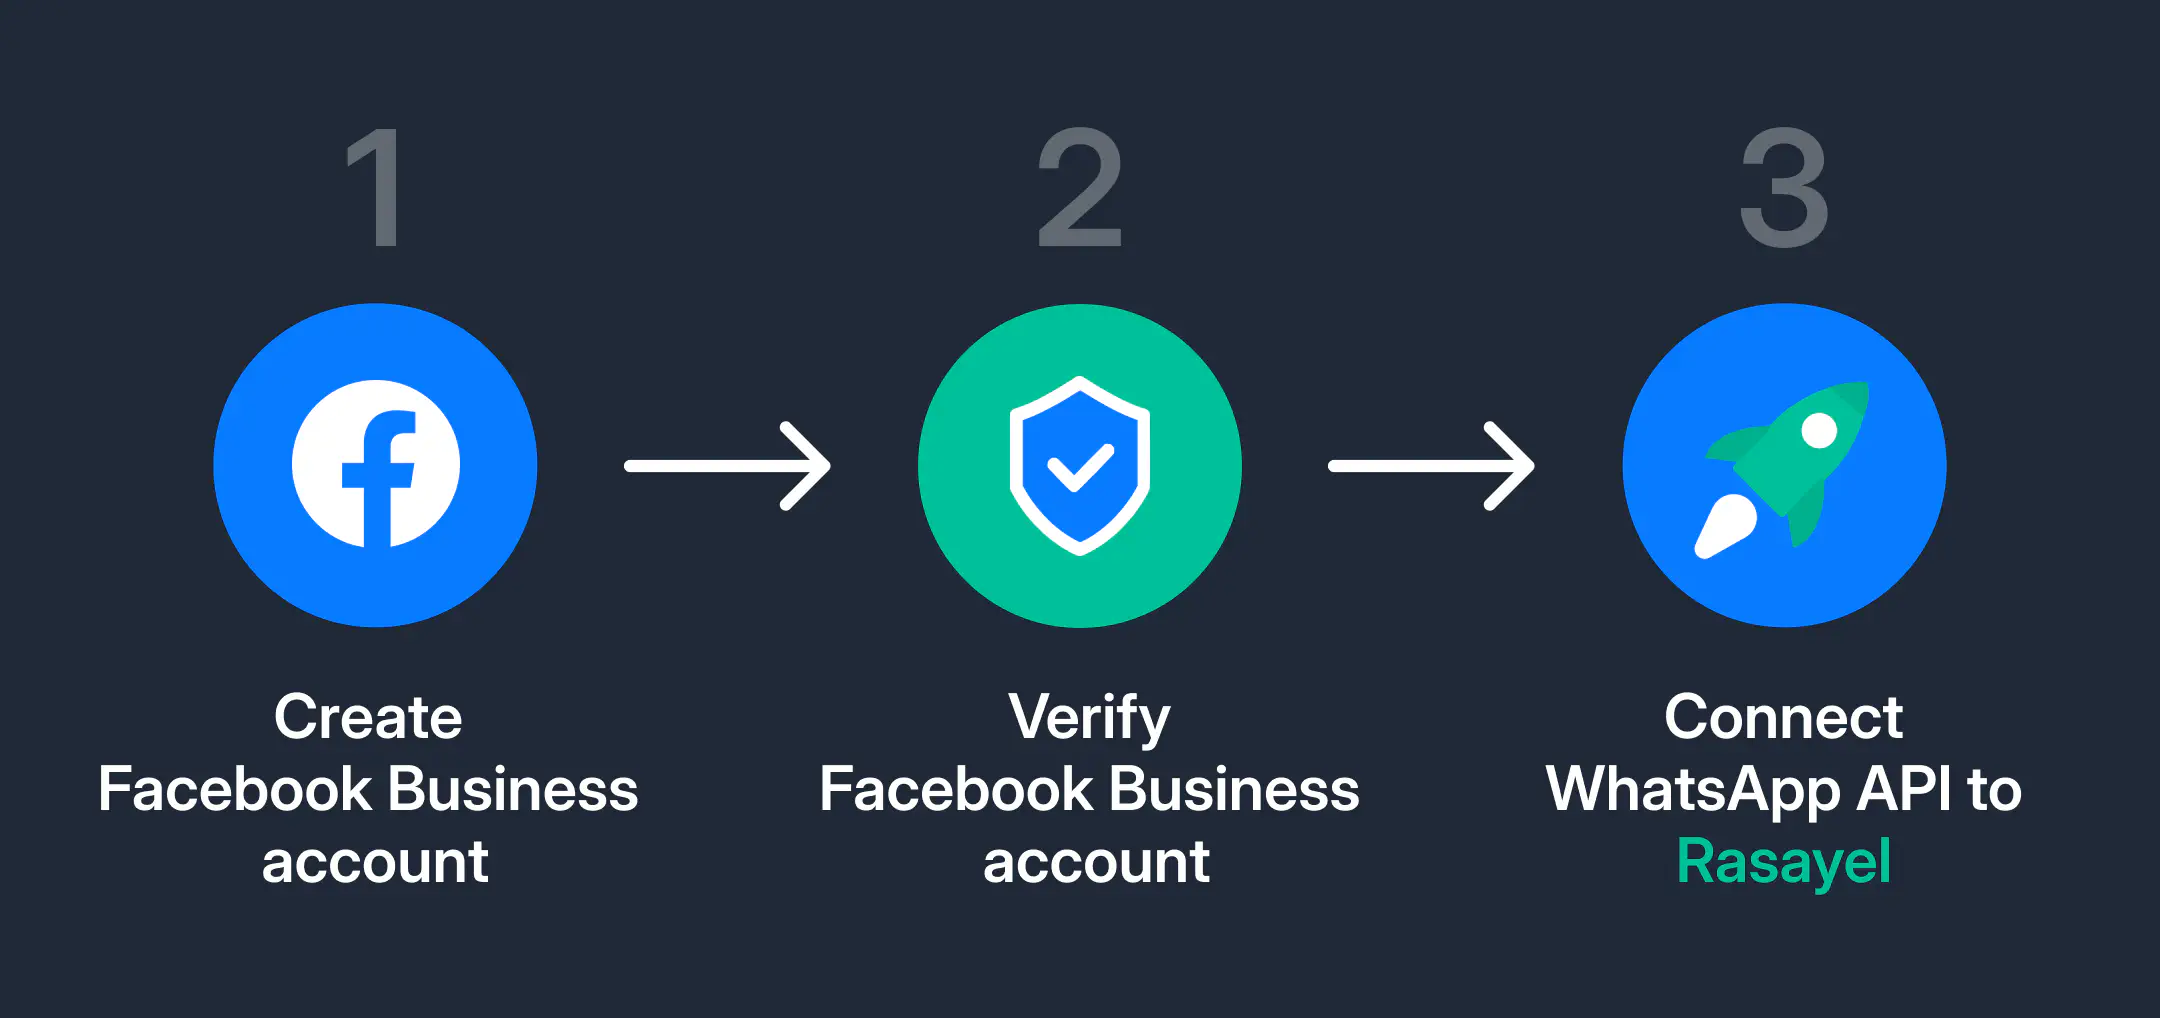
1. Create Meta Business account
- Create a Facebook Business Manager account or login to your existing account.
- Verify your Facebook Business Account. This is optional but we highly recommend it. You will need to submit any necessary documents, such as a certificate of incorporation or tax ID, to verify your business.
2. Create or select WhatsApp Business account
Select your Meta Business Account from the list of accounts. If you don’t have a Meta account, you can create a new one by choosing “Create a Meta Business Account” from the drop down menu.
3. Set up your business profile
Fill in you business information and details (these will be visible to customers).
- Set your display name, the timezone you operate in, business category, and description.
4. Add and verify WhatsApp business number
Add the phone number that will appear when customers message you on WhatsApp. You must use a phone number that is not currently active on WhatsApp or the WhatsApp Business App.
Choose how you want to verify your WhatsApp number: Text message or phone call.
Enter the 6-digit code you received.
5. Connect account to your communication platform
Deciding on a WhatsApp messaging solution is the 1st step because these tools give you access to the API and provide essential tools. We dive more into this below and the factors you need to evaluate in order to pick the right WhatsApp partner for your business needs.
If you choose Rasayel as your WhatsApp partner to sell and grow, you can connect your WhatsApp number in less than 3 minutes.
After that you can start messaging customers immediately and only need to complete Business Verification when you are ready to scale business-initiated conversations or request to become an Official Business Account (OBA).
After completing the signup you can immediately:
- Respond to unlimited customer-initiated conversations (24-hour messaging windows)
- Send business-initiated conversations to 250 unique customers in a rolling 24-hour period
- Register up to 2 phone numbers
6. Obtain user consent
Before initiating conversations with customers on WhatsApp, make sure users have opted in on WhatsApp to receive messages from your business. You have to clearly state the type of messages users will receive.
7. Submit message templates for approval
For outbound messages, pre-approved whatsapp templates are mandatory. Use your BSP’s platform to submit templates for WhatsApp’s approval.
You can draft messages for common scenarios like order confirmations or appointment reminders.
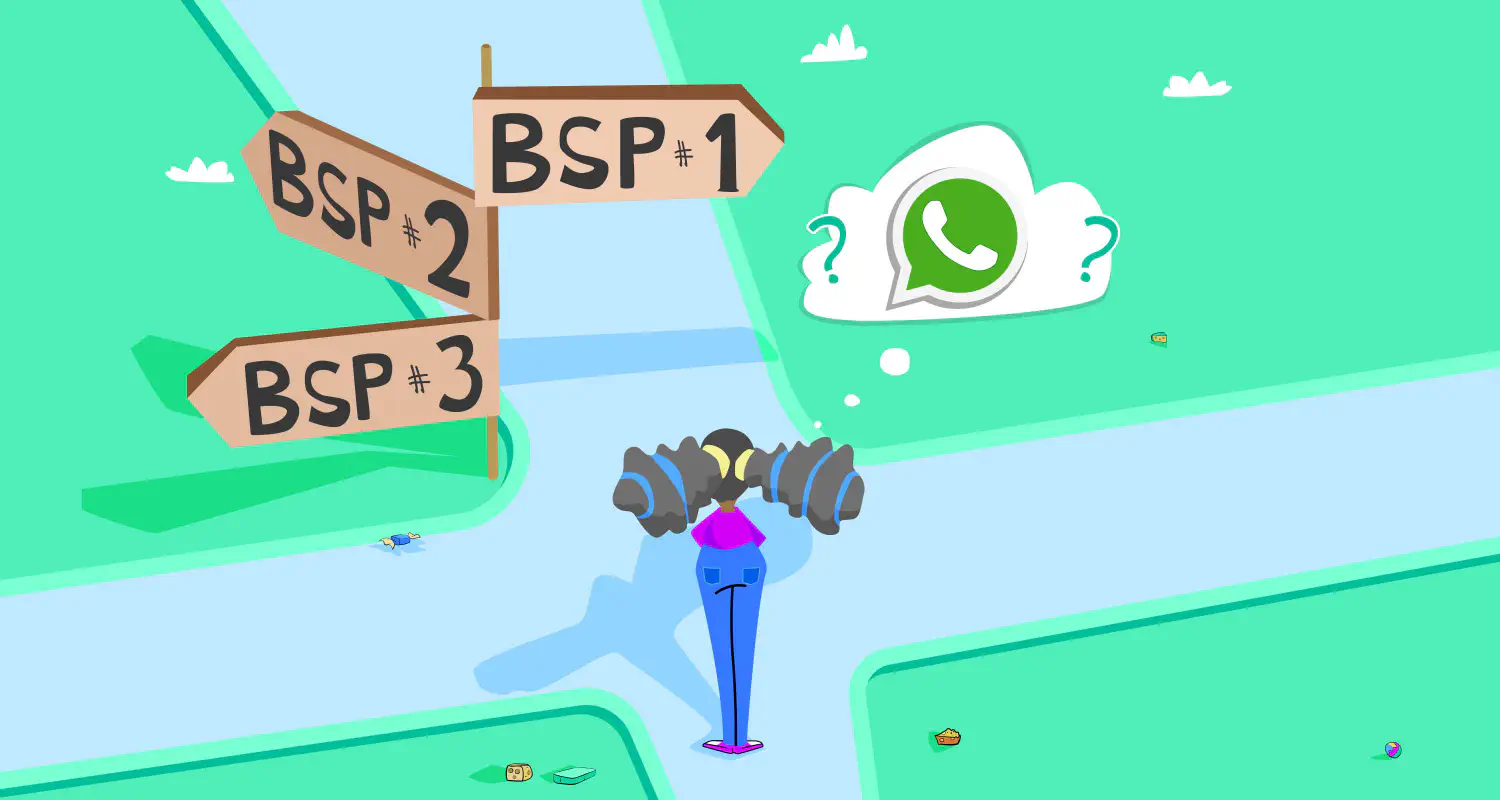
How to choose a WhatsApp API partner
While all WhatsApp API partners offer similar features, the right partner will align with your business goals and provide the necessary support for growth.
Here are some questions to ask when choosing a WhatsApp partner:
Does it integrate WhatsApp with your CRM and tools?
Make sure the API provider offers integrations with your existing CRM systems and sales tools. This is important for your team to manage customer interactions efficiently and not waste time switching between apps.
For example, Rasayel offers deep native WhatsApp integrations with CRMs like Hubspot, Salesforce and Pipedrive, as well as build custom WhatsApp integrations with 1000s of other tools through Zapier.
Does it support automation and AI features?
Look for providers that support complex automation features, such as AI-powered chatbots, automated workflows, and AI assistants. These automation tools can handle routine manual work, freeing up your sales team to focus on high-value tasks and building customer relationships.
Get early access
Does it offer clear tracking and reporting?
As a sales manager, you have to evaluate - what kind of analytics and reporting tools does the WhatsApp tool offer?
When you’re scaling, you will need visibility into sales metrics like response time, agent activity, and conversion rates. Choose a provider that gives you actionable insights, not just raw data.
Can the platform scale with your team?
If your company is growing, your tools should grow with you. Whether you have 5 reps today or 50 next quarter, your WhatsApp platform should easily handle more users, higher message volumes, and more complex workflows, without slowing you down.
Does it meet compliance and security standards?
Your API provider should follow WhatsApp’s policies and protect customer data with secure hosting, access controls, and encryption.
The best way to make sure a platform is compliant is by choosing a Meta Business Partner. These partners are vetted by Meta to meet strict security, privacy, and compliance with WhatsApp’s rules and global regulations.
This checklist helps you focus on what really matters: a WhatsApp tool that not only connects you to the API, but actually helps your sales team sell better, faster, and more efficiently.
Looking for trusted options? Here’s our list of top WhatsApp Business API providers for SaaS companies.
Ways B2B software companies use WhatsApp Business API to sell
Here are some real life examples of how B2B companies use the WhatsApp Business API to close deals and scale conversations every day.
Selling on WhatsApp with interactive messages
How: Businesses display software solutions inside WhatsApp chats using single-product or multi-product messages.
Result: Customers can browse, compare, and select the plan that fits their business, all without leaving the WhatsApp chat.
With the WhatsApp Business API, you can send interactive messages directly in conversations. Buyers can view your offerings, select the right plan or tier, and move forward, all without friction. This easy process gives customers more incentive to make a purchase.
Increase engagement with quick reply templates
Ever been frustrated by a low customer reply rate when you asked them a question?
With interactive message templates, you provide your customers with up to three options of answers to choose from. Customers can simply click on their desired response rather than typing out a reply.
How: Collect feedback or route conversations using buttons instead of open-ended questions.
Result: Higher response rates, faster follow-ups, and easier customer segmentation on WhatsApp.
With these interactive reply buttons, you can offer up to three easy options (e.g. “Loved it”, “It’s okay”, “Needs work”), which is perfect for post-purchase feedback or qualification flows. You can then route replies to reviews, sales, or support, depending on what they click.
Automate lead qualification with chatbot
How: Deploy a WhatsApp chatbot that asks key questions before handing off to a human rep.
Result: Better-qualified leads, less manual work, and faster first response.
Using a WhatsApp chatbot, you can automate the early part of your funnel. The bot can ask discovery questions, recommend resources, or instantly escalate to a rep if the lead is sales-ready.
A sales success story with WhatsApp Business Platform
A great example of the WhatsApp Business Platform in action comes from Qoyod, an accounting software company based in Saudi Arabia. After switching to the WhatsApp API, Qoyod doubled their sales in just 3 months—thanks to better visibility, faster workflows, and more personalized engagement.
Qoyod, an accounting software provider in Saudi Arabia, doubled their sales in just 3 months after switching to the WhatsApp Business API.
What they did:
- Centralized all sales conversations
- Automated routine tasks
- Sent personalized messages to their customers at scale to improve engagement and retention.
Results:
70% time saved on repetitive work
40% boost in customer satisfaction
Clearer team visibility for managers into the sales funnel
Read the full case study on how Qoyod’s sales teams 2X their sales
Is WhatsApp Business Platform right for your team
Unlike what many people think, the WhatsApp Business API isn’t just for enterprise giants. It’s a fit for any business that’s outgrown the limitations of the WhatsApp Business App, or needs more structure, automation, and team visibility.
If you’re still not sure if it’s the right time to make the switch? Here’s a quick checklist to help you decide:
You manage a high volume of conversations
Whether you’re qualifying leads, closing deals, or handling support — if your team is juggling dozens or hundreds of chats a day, the API gives you the scale and control the app can’t.You need multiple agents on 1 WhatsApp number
With WhatsApp API, multiple usersfrom your sales team can work from a shared inbox, assign chats, and avoid stepping on each other’s toes.You rely on automation and CRM data
Integrate WhatsApp with your CRM to give reps real-time customer context — and automate follow-ups, reminders, and handovers.You’re in a high-touch industry
If you’re in B2B SaaS, healthcare, HR tech, or any other industry where timing and personalization matter, the API helps you move faster and stay connected without manual effort.
Not sure if your business qualifies? Some industries are restricted by WhatsApp’s policies (e.g., gambling, tobacco). Check WhatsApp’s business eligibility list.
Ready to grow on WhatsApp with the API?
If your sales team has outgrown the WhatsApp Business App, the Business Platform is the natural next step.
It gives your team the tools to move faster, collaborate better, and close more deals—without losing the speed and familiarity of WhatsApp. From shared inboxes and automation to CRM integration and AI assistants, the Business Platform transforms WhatsApp into a serious sales tool built for scale.
Yes, switching can feel like a big step. But with features like coexistence, step-by-step setup, and platforms like Rasayel to guide you, it doesn’t have to be complicated.
Whether you’re managing a few reps or a growing team, the WhatsApp API helps you bring structure to your sales process, without sacrificing the personal touch that makes WhatsApp so effective in the first place.
Still not sure if it’s the right time to switch? We’re here to help you figure it out.
Frequently Asked Questions
Additionally, if you use third-party tools for managing conversations, there may be additional costs associated with their services.

Yasser is a content editor and writer who enjoys exploring innovative tech ideas in B2B SaaS and writing about them.
When he’s not writing stories, you’ll find him gaming, traveling, binge watching some random series, or just relaxing by the beach in Alexandria.