8 Steps to Mastering HubSpot Workflows for Sales, Support & Engagement

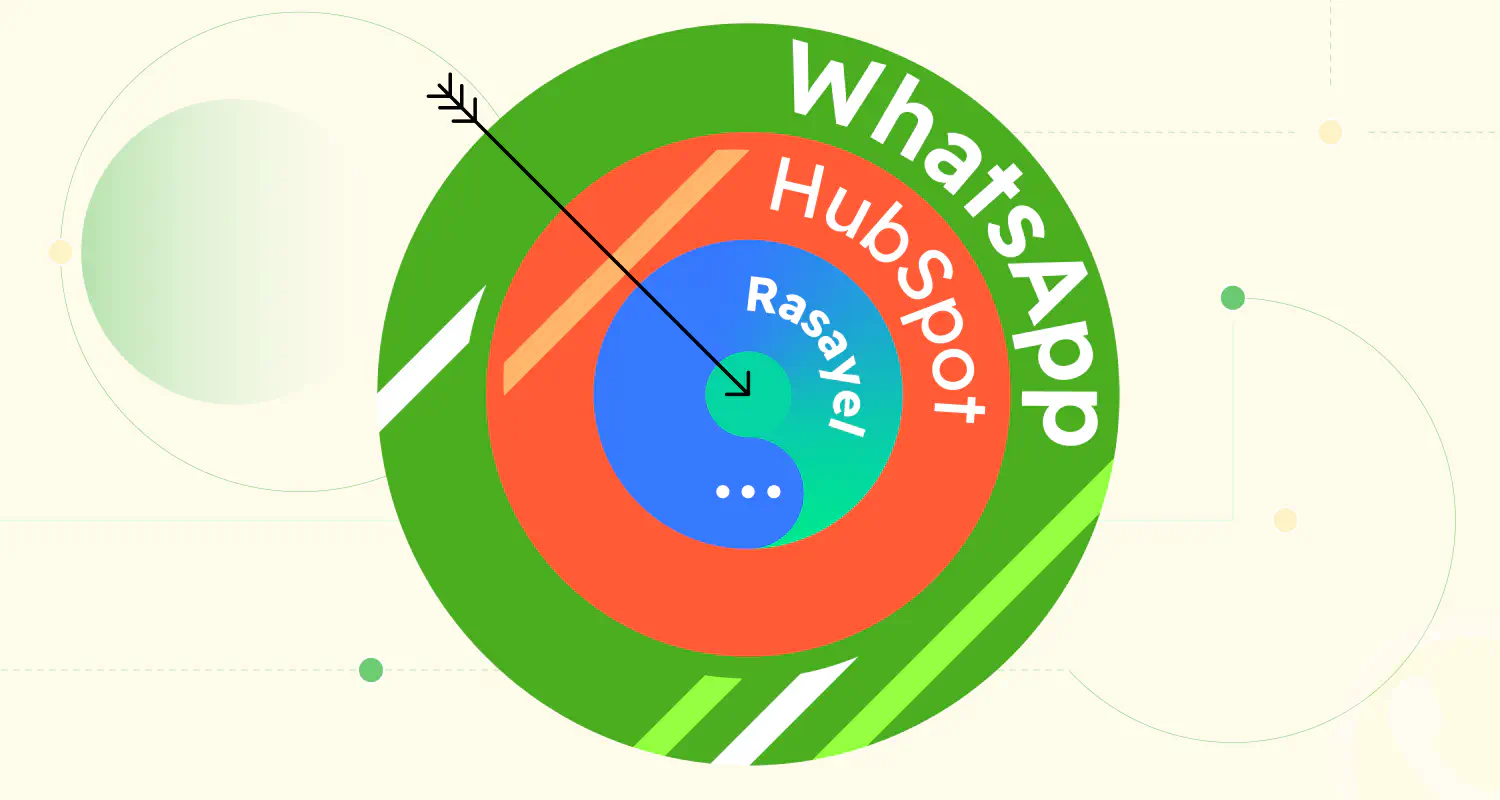
HubSpot workflows are a versatile tool that empowers you to automate and streamline your marketing, sales, and customer service processes. Similar to platforms like Zapier, HubSpot workflows involve triggers and actions, allowing you to create sophisticated sequences that respond to specific events. In this guide, we’ll explore how to create effective workflows using HubSpot’s capabilities, particularly focusing on its integration with Rasayel for enhanced messaging and communication.
What are HubSpot Workflows?
HubSpot workflows are automated sequences that activate when specific triggers occur within the HubSpot ecosystem. Unlike some other platforms, HubSpot workflows are primarily triggered by internal events or changes to contact properties within HubSpot rather than by external triggers. This distinction ensures that your workflow actions remain tightly integrated with HubSpot’s data and operations.
Types of HubSpot Workflows
HubSpot workflows are incredibly versatile and can be used for a variety of purposes. Here are some of the most common examples of workflows for sales & support:
1. Lead Nurturing Workflows
These workflows are designed to keep leads engaged until they are ready to become customers. They can include a series of emails, calls, and other touchpoints that educate leads about your products or services and build trust.
2. Marketing Automation Workflows
These workflows automate repetitive tasks, such as sending welcome messages, assigning leads to salespeople, and scoring leads. This can free up your marketing team’s time to focus on more strategic initiatives.
3. Sales Automation Workflows
These workflows automate tasks that salespeople do daily, such as following up with leads, sending proposals, and scheduling appointments. This can help salespeople close more deals and save time.
4. Customer Service Workflows
These workflows automate tasks such as sending support tickets, responding to emails, and resolving issues. This can help customer service teams provide better service and resolve issues faster.
5. Onboarding Workflows
These workflows automate the process of onboarding new customers. They can include a series of emails, calls, and other touchpoints that help new customers get up to speed with your products or services.
6. Event-Based Triggering
Event-based workflows in HubSpot activate in response to specific customer actions or date-related triggers. They are highly effective for personalizing customer experiences, such as sending birthday wishes, renewal reminders, or engaging customers based on their interaction with your website or product.
7. Re-Engagement Campaigns
Re-engagement workflows focus on reconnecting with inactive leads or customers. These workflows can be set up to automatically reach out with targeted messages, special offers, or updates, aiming to reignite interest and bring them back into the active customer fold.
This is just a sampling of the many different types of HubSpot workflows that you can create. With a little creativity, you can use HubSpot workflows to automate almost any task in your business.
How to Create a Workflow in Hubspot: Step-By-Step Guide
Creating a workflow in HubSpot begins with a blank template. You need to select the type of workflow based on your needs, like contact-based or deal-based. This choice determines the triggers for your workflow.
This decision aligns the workflow with your specific marketing and customer engagement objectives.
Step 1: Start From Scratch
- Navigate to your HubSpot account and go to “Automation” > “Workflows.”
- Click “Create Workflow” > “From Scratch” > “Blank workflow” > “Next” to begin building your new workflow.
- After you select the “From scratch” option, you can use options like Contact-based, Company-based, Deal-based workflows, etc. depending on your needs. This will determine which factor triggers the workflow.
Step 2: Set Enrollment Triggers
Triggers determine when your workflow initiates. Select the conditions that need to be met for a contact to enter the workflow.
In HubSpot, triggers are internal events, often tied to contact properties, company properties, deal properties, etc.
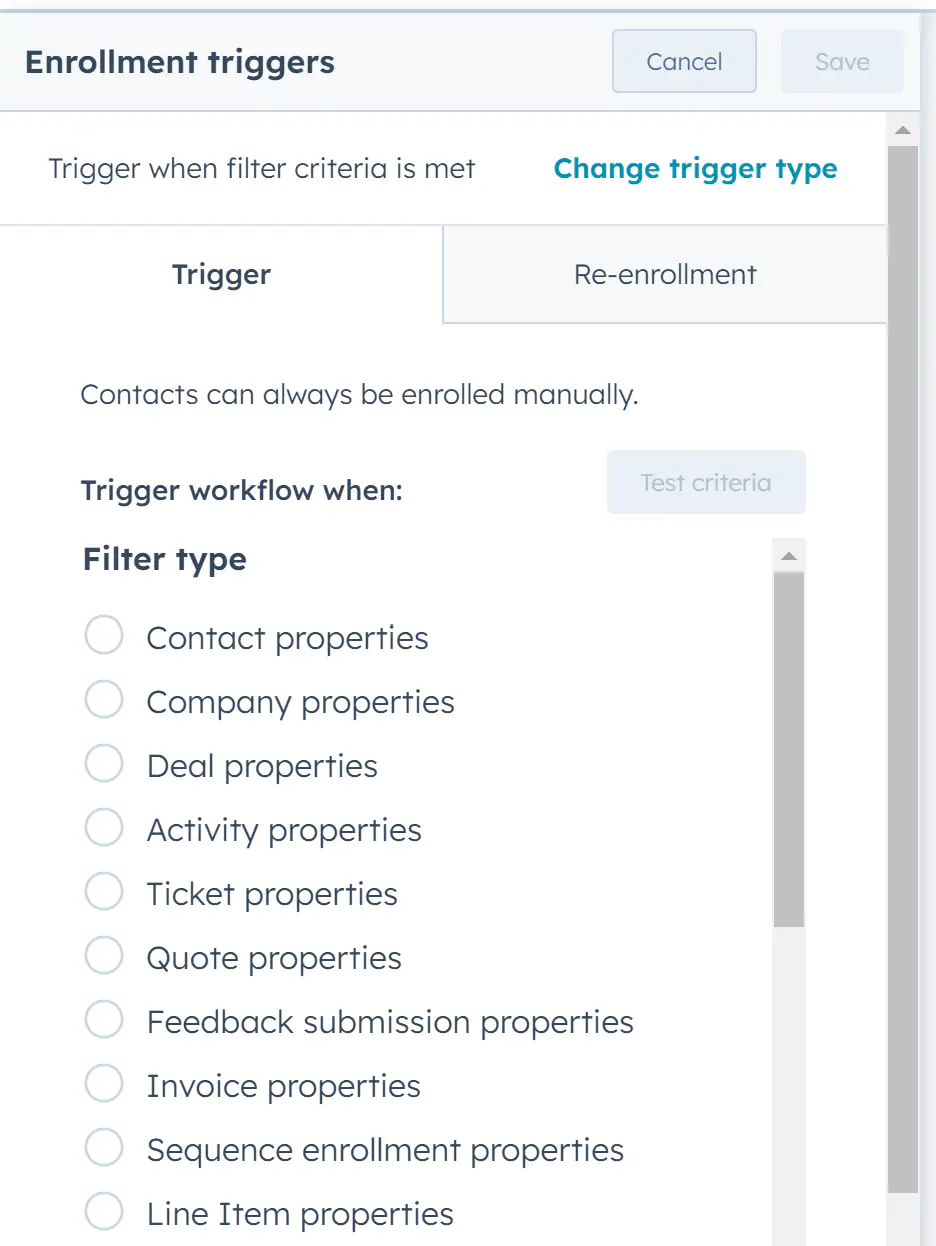
n this case, I want to demonstrate how the workflow works so I will choose “Contact properties” > “Email” and add my own email. This will fire the workflow to send a message to only one contact - myself. If you select “Lifecycle stage” > “Lead,” the workflow will send a message to all contacts that meet the criteria.
Step 3: Add & Configure Actions
- Now, attach actions to your trigger. Click the “+” icon below the trigger to add actions to the workflow sequence.
- Rasayel offers two workflow actions: “Send SMS” and “Send WhatsApp Message” along with the ability to assign conversations. For this example, we will select “Send WhatsApp Message.”
- Depending on the chosen action, configure its details. If you’re sending a message via Rasayel, you’ll need to provide the channel, select a template, and fill in template variables.
- For the recipient’s phone number, utilize a contact property where the phone number is stored in HubSpot.
Step 4: Assign Conversations
- Optionally, assign conversations to specific agents using available options like “Do not change conversation assignee” or “Assign conversation to the current contact’s owner in HubSpot.”
Step 5: Add HubSpot Actions
- After the Rasayel actions, you can include additional HubSpot actions. These can include sending follow-up emails, changing properties, or any other action within the HubSpot ecosystem.
Step 6: Review & Publish Workflow
- Once you’ve configured the workflow, you can review it by clicking the “Review and publish” button”
- To enroll the contacts who met the criteria, select Yes, enroll existing contacts who meet the trigger criteria as of now” and click “Turn on.”
- HubSpot will automatically trigger the workflow for eligible contacts, sending them the designated messages. In this example, only one contact meets the trigger criteria.
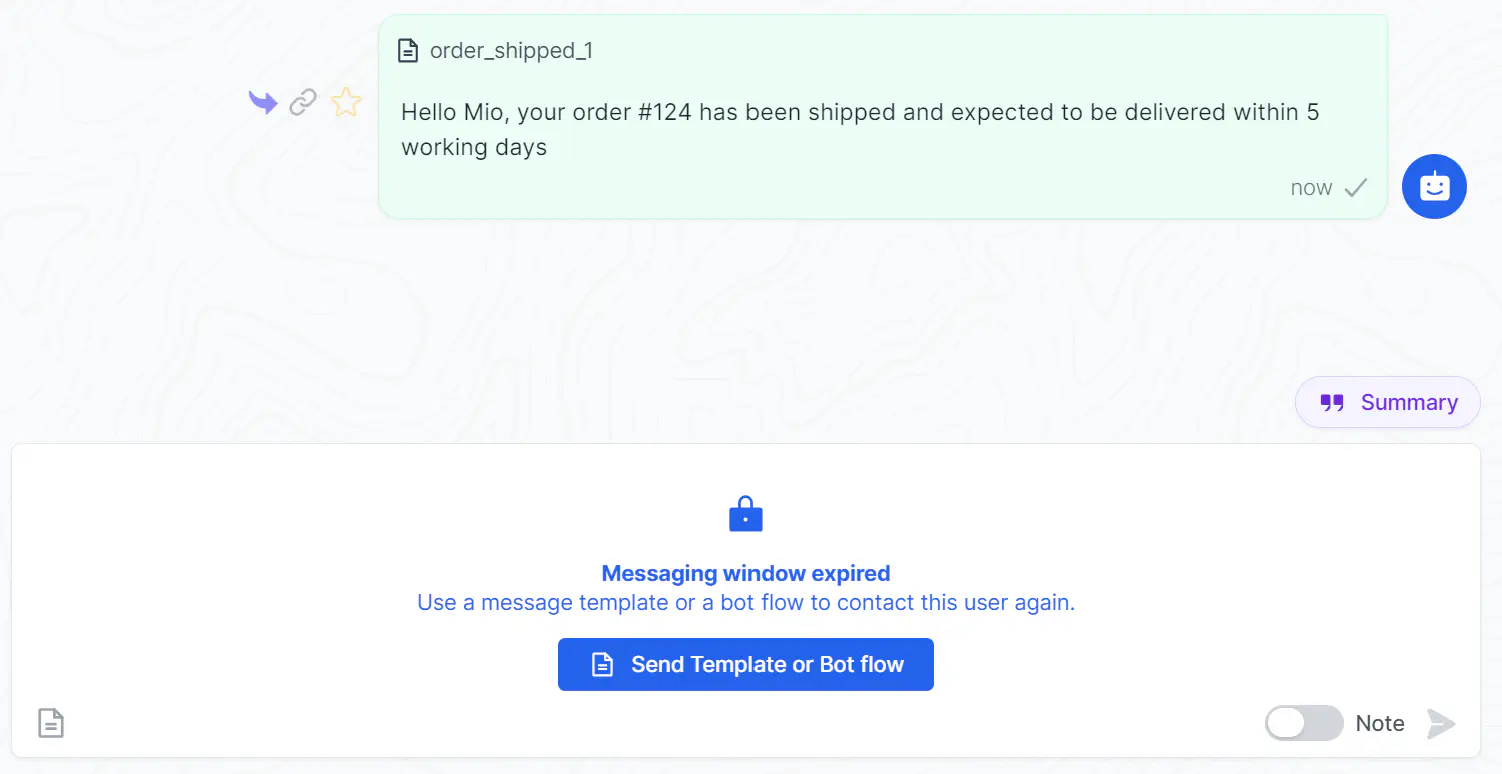
Once published, the workflow will execute. Here’s the message sent via this workflow:
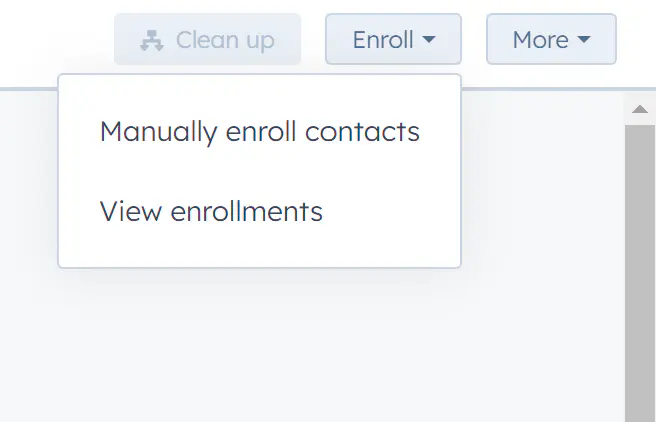
Step 7: Manually Enroll Contacts
By clicking the “Enroll” button, you can manually enroll more contacts or view past enrollments.
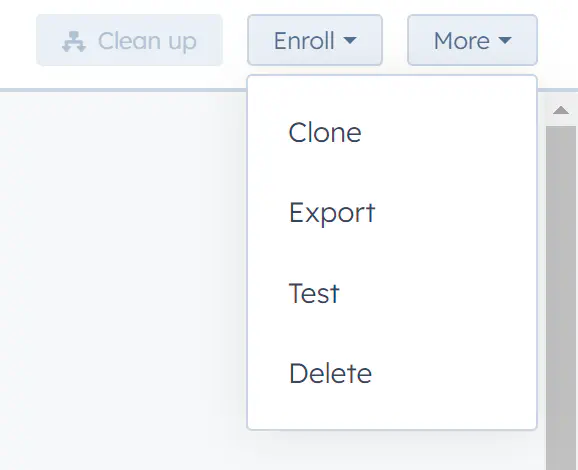
By clicking “More” you have the options to clone, export, test, or delete the workflow.
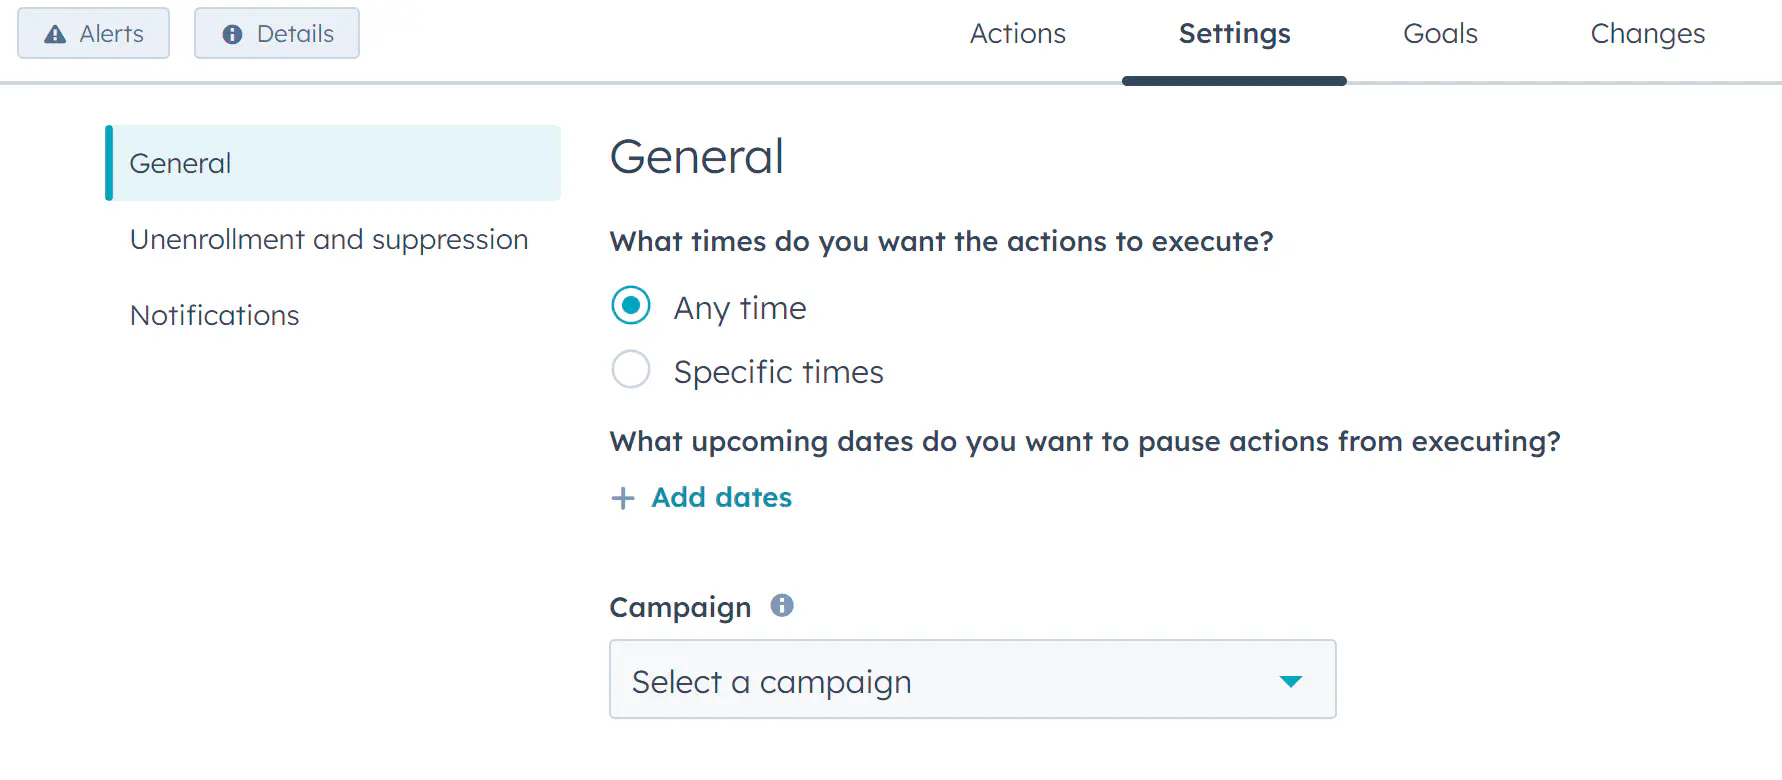
Click “Settings” if you want to determine a specific time when you want the workflow to trigger or select dates when you want to pause actions from executing.
Step 8: Monitor Workflow Execution
HubSpot provides insights into the performance of your workflows:
- Go to “Automation” > “Workflows” and find your workflow.
- Click “More” and select “View Details.”
- Navigate to “Enrollment History” to view details of completed enrollments and actions taken.
Conclusion
HubSpot workflows provide a powerful tool to automate processes and engage with your audience effectively. By leveraging the Rasayel integration, you can deliver personalized messages at crucial touchpoints in the customer journey. Experiment with different triggers, actions, and enhancements to create workflows that drive engagement, conversion, and customer satisfaction.
Frequently Asked Questions
A HubSpot workflow is an automated sequence that activates when specific triggers, mainly internal events or changes to contact properties within HubSpot, occur.
Triggers in HubSpot are often tied to internal events like contact properties, company properties, or deal properties. After choosing the desired factor, select the specific conditions you want to act as your trigger.
Yes, with the Rasayel integration, you can choose the workflow action “Send WhatsApp Message”.
By clicking the “Enroll” button, you can manually enroll more contacts or view past enrollments.
Go to “Automation” > “Workflows”, find your workflow, click “More”, and select “View Details”. You can then navigate to “Enrollment History” to see details of completed enrollments and actions.
The Rasayel integration allows users to send personalized WhatsApp messages at crucial touchpoints in the customer journey, enhancing engagement and communication.
Learn more
If you'd like to learn more about how WhatsApp can help you grow your business, please reach out to us on WhatsApp at +13024070488 (Click to chat now).
We also offer a free consultation session where we review your use case, answer any questions about WhatsApp, and help you build a strategy to make the best out of the platform. Book a call with us here. We'd love to speak with you:
Book a call: Europe, the Middle East, and Africa
Book a call: LATAM
Curious about Rasayel? Schedule a demo today.

Ashraf is an expert in WhatsApp Business. He has helped 500+ B2B software companies run sales, support, and operations on WhatsApp. He specializes in WhatsApp Business API projects that reduce sales cycles and improve customer experience, and is great at both sales strategies and technical WhatsApp knowledge.